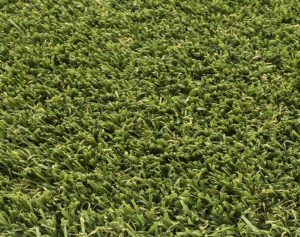
Joining artificial grass properly is the difference between a flawless lawn and one where the seams stand out every time you look at it. At As Good As Grass, we’ve installed thousands of square metres of turf across homes, schools, and sports pitches – and we know the tricks to make joins strong, secure, and practically invisible.
Quick Navigation:
🛠️ Tools & Materials You’ll Need
Before you start cutting and gluing, make sure you’ve got the right kit to hand. The right tools will save time and stop mistakes.
- Sharp utility knife
- Artificial grass seaming tape
- Specialist jointing adhesive (Sport-Fix polyurethane or equivalent)
- Mastic gun or notched trowel
- Weighted planks or boards (to press the join while drying)
- Gloves and a stiff brush
👉 As Good As Grass supplies adhesive tubs, glue sticks, and seaming tape directly if you’re tackling a DIY fit.
✂️ Preparing the Edges
Clean, straight cuts are the secret to an invisible join. Here’s how to prep your turf so the seam blends naturally.
- Roll out your two pieces of turf and let them relax in the sun for an hour if possible – this prevents curling.
- Fold back 30–40cm on each side of the join.
- Trim 20–30mm from each edge, cutting between the tufts (never across blades) so the join looks natural.
📏 Using Joining Tape
Joining tape is what holds the seam together. Laid properly, it becomes the backbone of a strong, long-lasting join.
- Lay the tape shiny-side down along the entire length of the seam.
- Make sure it’s central and secure before folding the turf back over.
- Leave a 2–3mm gap between each edge of turf – this prevents blades bunching and gives the most realistic finish.
🧴 Applying Glue
The adhesive is what bonds everything in place. Spread it evenly and give it time to cure for a rock-solid finish.
- Apply adhesive evenly across the tape using a zig-zag or two parallel beads.
- Fold one edge onto the tape, then the other, pressing firmly into the adhesive.
- Walk along the seam or use a weighted plank to ensure full contact.
- Allow at least 2–3 hours for the glue to cure before brushing up the pile.
🤫 How to Hide Seams
A professional finish means you shouldn’t notice the join at all. These tricks will help disguise the seam so it looks seamless.
- Always cut between tufts – never straight across fibres.
- Keep pile direction consistent across all rolls.
- Brush the join once cured to blend fibres.
- Sand infill (if used) will further disguise any minor lines.
⚠️ Common Mistakes to Avoid
Most DIY joins go wrong for the same few reasons. Steer clear of these pitfalls and you’ll get a pro-quality result.
- ❌ Using the wrong glue – always use specialist polyurethane adhesive, not household glues.
- ❌ Overlapping edges instead of trimming – creates a ridge.
- ❌ Rushing drying time – seams need 2–3 hours under pressure.
- ❌ Forgetting pile direction – mismatched direction makes seams obvious.
🧰 DIY Joins vs Professional Finish
Joining artificial grass yourself is possible, but it’s also where most DIY installs go wrong. A small mistake with cutting, gluing, or lining up the pile can leave a visible seam that’s hard to hide once set.
| DIY Join | Professional Join |
|---|---|
| Lower upfront cost if you already have tools | Seams guaranteed to be strong and virtually invisible |
| Risk of visible ridges or gaps if edges aren’t prepped correctly | Proper cutting between tufts and aligned pile direction |
| Time-consuming and messy if you’re new to adhesives | Fast install – our teams fit 500+ lawns a year |
| Durability depends on glue quality and curing time | Backed by professional installation guarantees |
⏳ How Long Do Joins Last?
When installed correctly, joins in artificial grass can last 10–15 years or more – usually as long as the turf itself. Failures nearly always come from:
- Cheap adhesive or tape not designed for outdoor use
- Insufficient pressure while curing
- Edges cut across fibres rather than between tufts
That’s why most homeowners prefer leaving joins to the experts, even if they handle other parts of the groundwork themselves.
❓ FAQs
Got questions about joins, glue, or why turf sometimes looks crunchy? Here are the straight answers to the things people ask most.
How do you join two pieces of artificial grass together?
With joining tape and adhesive. Lay the tape, apply glue, and fold the edges together with a small gap for best results.
Can you see the join in artificial grass?
Not if installed correctly. Cutting between tufts, keeping pile direction the same, and brushing the fibres helps hide joins.
What glue do you use for artificial grass?
We recommend a specialist two-part polyurethane adhesive such as Sport-Fix — designed for outdoor turf and weather-resistant.
How to use joining tape for artificial grass?
Lay shiny-side down under the seam, apply adhesive on top, then fold grass edges onto it.
Why does my artificial grass sound crunchy?
That’s often due to a poor base (too much sand or not compacted properly) rather than the join itself.
What destroys artificial grass?
Excessive heat (BBQs, fire pits), sharp objects, or using the wrong cleaning chemicals can damage the fibres.
📞 Need a Seamless Finish?
DIY joins can be tricky. At As Good As Grass, we install over 500 lawns a year with professional seams that last for decades. Whether it’s a back garden, a school pitch, or an event hire surface, our expert fitters guarantee a flawless finish.
👉 Request a Free Survey Today or call 0161 207 3007 to speak to our team.


