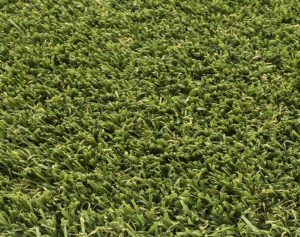
Preparing the ground properly is the part of an artificial grass installation that matters most. The grass on top might get all the attention, but the finish, drainage, and long-term lifespan of the lawn all depend on what sits underneath it. If the base is rushed, uneven, or built with the wrong materials, even premium turf can end up feeling lumpy, holding water, or wearing badly far sooner than it should. Whether you are planning a self-install or simply want to understand how the job should be done, getting the groundwork right is what separates a lawn that lasts from one that causes problems.
🧱 Quick Answer: How to prepare ground for artificial grass
- Mark your finished levels clearly
- Remove around 75mm of soil
- Lay a geotextile membrane
- Install secure edging
- Add and level a Type 1 MOT sub-base
- Compact the base thoroughly
- Add a final screed layer such as sharp sand, grano dust, or limestone fines
- Compact, level, and only then install the grass
Need Help With Ground Preparation or Full Installation?
We supply and install artificial grass properly from the ground up. If you want us to handle the full job – or step in after you’ve done part of the prep – speak to our team for honest advice.
🔑 Quick Takeaways
- The base matters more than people think: the grass is only as good as the prep underneath.
- Type 1 MOT helps create a strong, drainage-friendly base when installed and compacted properly.
- The final screed layer affects the finish – this is where dips and unevenness are prevented.
- DIY can save money, but rushed groundwork often leads to bigger costs later.
🧭 Jump to:
- Why Ground Preparation Matters
- Step-by-Step Ground Preparation
- What Base Should You Use?
- Drainage Preparation
- Common Ground Preparation Mistakes
- Can You Prepare the Ground Yourself?
- Tools Needed
- FAQs
Why Ground Preparation Matters So Much
A lot of people focus on the grass itself – pile height, softness, colour, pet-friendliness, and price per square metre. Those all matter, but if the base underneath is poor, the end result will still disappoint.
Good ground preparation helps with:
- Drainage so rainwater clears properly
- Stability so the lawn feels solid underfoot
- Appearance so the finished surface looks smooth and natural
- Lifespan so the grass wears evenly over time
- Lower maintenance because dips, movement, and edge issues are less likely
This is one of the biggest reasons a quality installation performs differently from a cheap one. If you have already read our guide on how to spot a bad artificial grass installation, you will know that many common problems start here.
Step-by-Step: How to Prepare Ground for Artificial Grass
Here is the process we recommend for a typical garden installation.
Step 1: Identify the Finished Levels
Before you remove anything, work out exactly where the finished height of the grass should sit. This affects everything that follows, including excavation depth, edging, drainage, and how neatly the lawn meets patios, paths, or paving.
A common mistake is guessing this as you go. That usually leads to messy transitions or a lawn that finishes too high or too low.
Step 2: Remove the Existing Soil
For a typical garden prep, remove around 75mm of soil from the intended finished height. This gives you space to build a proper base rather than simply rolling grass over unstable ground.
If the area is especially soft, boggy, root-heavy, or poorly drained, you may need to go deeper depending on the conditions.
Step 3: Lay a Geotextile Membrane
Once the area has been excavated and cleared, lay a geotextile membrane across the area. This helps separate the base materials from the soil beneath and reduces the chance of weed issues pushing up later.
It is a simple step, but it plays an important role in keeping the base cleaner and more stable over time.
Step 4: Install the Edging
Edging gives the lawn structure and helps secure the perimeter properly. Depending on what the grass is finishing against, this could be:
- Pressure-treated timber
- Smooth concrete edging
Concrete is often preferred where the lawn meets tiles, paving, or other firm surfaces. Timber is often used where the edge needs support and the grass will be tucked over and fixed down.
Good edging is one of those details that many people only notice when it has been done badly.
Step 5: Add the Type 1 MOT Sub-Base
Next comes the main structural layer. We often use Type 1 MOT because it locks together well, creates a strong base, and supports drainage. Rake it out evenly to the correct level, usually to just below the intended finished height.
Compared to using too much sand alone, a proper Type 1 MOT base is generally more stable over time and less likely to develop dips.
Step 6: Compact the Base Thoroughly
Compaction is vital. A whacker plate or compacting machine should be used repeatedly until the base is firm and stable.
Sometimes a light sprinkle of water can help the material bind together, but too much water makes compaction harder. In wet weather, this step often takes longer and can become much less enjoyable for DIY installers.
Step 7: Add the Final Screed Layer
Once the main base is compacted, add your final levelling layer at around 10mm. This is where you refine the finish and remove any minor dips before the grass is fitted.
Common options include:
- Sharp sand – cost-effective, compacts tightly, and easy enough to work with
- Grano dust – very firm once compacted, excellent for stability, but harder to screed neatly
- 2–6mm limestone fines – easy to work with and good for drainage, though not as locked-up as sharp sand or grano
After compacting, do a final screed and fill any low points. This stage has a huge effect on how the lawn looks once installed.
Step 8: Fit and Secure the Grass
Only once the groundwork is complete should the artificial grass be laid, trimmed, joined, and secured around the perimeter.
If timber edging has been used, staples or fixings can often be used in the correct way. If concrete edges are involved, adhesive methods are more appropriate. The key thing is using the right fixing method for the base you actually have.
| Stage | What It Does | Why It Matters |
|---|---|---|
| Excavation | Creates room for the full build-up | Prevents a shallow, unstable finish |
| Membrane | Separates soil and base materials | Helps reduce weed and contamination issues |
| Type 1 MOT | Forms the main structural base | Improves strength and drainage |
| Compaction | Binds the base tightly | Reduces sinking and movement later |
| Final screed | Levels the surface before laying | Helps create a smooth, natural finish |
What Base Should You Put Under Artificial Grass?
For most garden installs, you need a stable, compacted base that drains well and holds its shape over time. That is why a proper sub-base matters more than simply spreading a bit of sand and hoping for the best.
In many cases, the ideal build-up includes:
- Excavated and cleared ground
- Geotextile membrane
- Type 1 MOT sub-base
- Final screed layer
- Then the grass itself
If you are working on a different type of surface, such as concrete, slabs, tarmac, or decking, the prep process changes. We already cover some of those separately in blogs like:
How to Prepare Ground for Good Drainage
Drainage is one of the main reasons artificial grass performs brilliantly in some gardens and badly in others. The grass backing itself allows water through, but the base underneath still needs to cope with that water properly.
To improve drainage:
- Avoid a soft, shallow base
- Use the right aggregate materials
- Compact the base correctly
- Make sure levels and falls make sense
- Adjust the prep if the site is already boggy or heavy with clay
If drainage is poor in your garden, that does not mean artificial grass is a bad idea. It just means the base has to be built properly. That is also why blogs like cost to lay artificial grass on soil and artificial grass for waterlogged North West gardens are useful follow-on reads.
🛠️ Expert Insight: Many artificial grass problems that show up later – dips, puddles, unstable edges, and lumpy areas – are usually groundwork issues rather than grass issues. That is why we treat the base as one of the most important parts of the whole job.
Common Ground Preparation Mistakes to Avoid
Even fairly confident DIYers can run into problems here. The most common mistakes include:
- Not digging out enough depth
- Skipping the membrane
- Using the wrong base material
- Failing to compact enough
- Rushing the screed layer
- Poor edging or no edging at all
- Trying to work in saturated ground conditions
These mistakes usually lead to one of three outcomes:
- The lawn looks uneven
- The lawn drains poorly
- The lawn has to be repaired or redone much sooner than expected
Can You Prepare the Ground Yourself for Artificial Grass?
Yes – if you have the time, patience, and are comfortable with physical groundwork. Done carefully, DIY prep can save money. In fact, AGAG’s own self-install notes make clear that this is a realistic route for people on a budget, provided they take their time and follow the steps properly.
That said, it is also one of those jobs that sounds easier than it is. Excavation, barrowing material, compacting, and getting the final levels right is hard work, especially on larger gardens.
For some people, the best middle ground is doing part of the prep themselves and then having the surface supplied and/or professionally fitted by our team. If that sounds more realistic, our artificial grass installation service is the best next step.
What Tools Do You Need to Prepare the Ground?
The exact kit depends on the size of the job, but common tools include:
- Spade
- Wheelbarrow
- Rake
- Knife for trimming grass later
- Whacker plate / compactor
On larger jobs, a turf cutter, micro digger, or tracked barrow can speed things up and make life much easier. Even on smaller gardens, compaction equipment is one area you do not want to improvise badly.
FAQs About Preparing Ground for Artificial Grass
Before you start digging, these are the questions most people ask. The answers below cover the common uncertainties around excavation depth, membranes, base materials, drainage, and whether a DIY prep is realistic.
How deep should you dig for artificial grass?
For a typical garden installation, around 75mm is a common starting point from the intended finished height. Some gardens may need more depending on drainage, soil condition, roots, and overall site levels.
Do you need a membrane under artificial grass?
Yes, in most cases a geotextile membrane is recommended. It helps separate the base from the soil underneath and supports a cleaner, more stable build-up.
What is the best base for artificial grass?
A compacted sub-base using materials such as Type 1 MOT is a strong option for many garden installations because it provides structure and supports drainage. A final levelling layer is then used above it before laying the turf.
Can you lay artificial grass straight on soil?
No, artificial grass should not be laid directly onto loose soil. The ground should be excavated, levelled, compacted and built up with a proper sub-base and final screed layer before the grass is fitted. Simply rolling grass onto soil is likely to cause sinking, wrinkles, poor drainage and weed problems.
What sand should go under artificial grass?
Sharp sand is a common and practical choice for the final screed layer. Grano dust and limestone fines can also be used depending on the finish and drainage characteristics you want.
How do you prepare a garden for artificial grass?
To prepare a garden for artificial grass, remove the existing turf, dig down to the correct depth, install a membrane, add secure edging, build a compacted Type 1 MOT sub-base, apply a final levelling layer, then check the levels before fitting the grass.
Can I prepare the ground for artificial grass myself?
Yes, but it is physical work and the finish depends heavily on the quality of the levels, compaction, and edging. DIY prep can save money, but poor prep can also create expensive problems later.
Want a Lawn That Looks Right and Lasts?
We prepare, supply, and install artificial grass properly – with the right excavation, the right base, and the right finish for your garden. Whether you want a full install or help after doing part of the groundwork, we’re here to help.